Teaching with Technology

Using the Panopto recording tools

ITS recommends using the Panopto desktop app or the Panopto web browser app to create your videos. Either choice creates higher-quality recordings that integrate with Panopto’s video tools. After recordings are completed, they are automatically uploaded to Panopto.

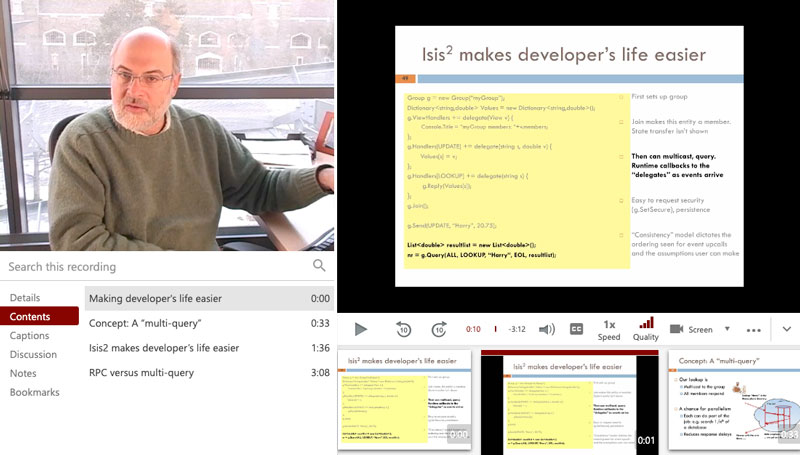
panopto-video-playback.jpg
click to view a sample video using the Panopto app in a new window

To access the recording tools, use the Create button at the top of the Panopto activity block in your Moodle course, or go to the Panopto website. Learn more at the Panopto help documentation or contact its@reed.edu if you need further assistance. 

There are also several ways to record videos are listed at this recording lectures webpage.  

Using the Panopto desktop app


Navigate to the Panopto media library you'd like to record your video, and click on the Create button at the top of the page.
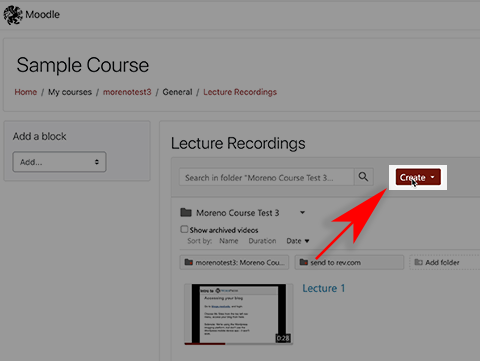
panopto app recording create button

Moodle users

If you're using a Moodle course, choose the Lecture Recordings Panopto block. 
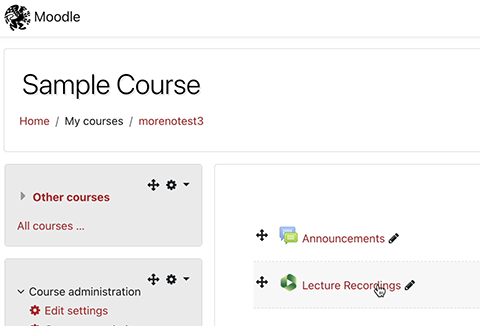
 panopto app recordingchoose panopto block

Choose Panopto for Mac (if using a Mac), then choose Launch Panopto. 
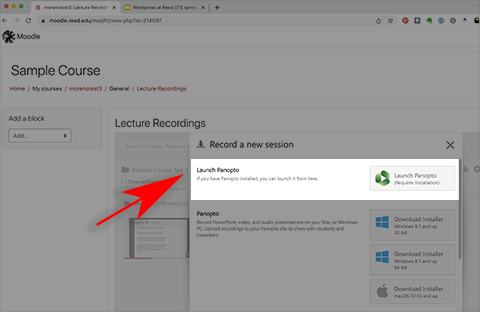
panopto app recording launch panopto button

If this is your first time using the Panopto desktop app, you will need to download the app, and give permissions for the app to use your microphone, camera, and record your screen. 

Start recording

  1. Choose your audio and video source. If you're on a Mac and aren't using an external microphone or webcam, choose the Facetime HD Camera for your primary video source, and your Macbook microphone your audio source.
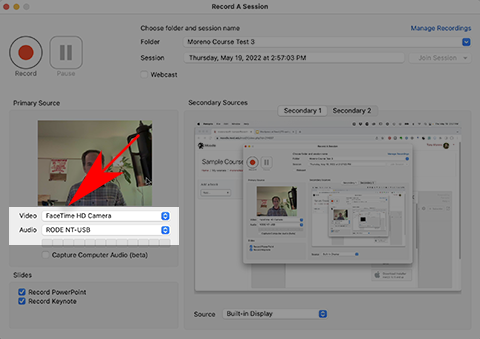
    panopto app recording interface video audio source
  2. If you are recording a google slideshow presentation, choose your secondary source. If using two monitors, choose the appropriate monitor that will display the slideshow presentation. Powerpoint tends to take up both screens with dual monitors with its default presetntation settings, which may not be desirable; follow these instructions to get Powerpoint out of full screen mode; be sure to make Powerpoint full screen on the second monitor if you change the presentation mode to "browsed by an individual (window)."
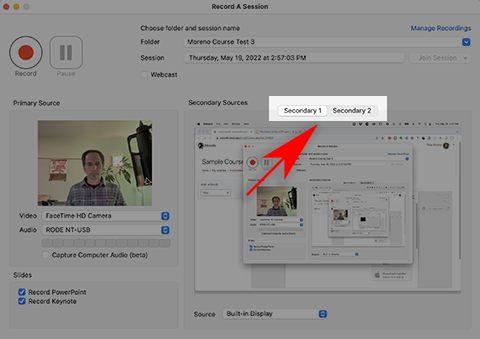
    panopto app recording interface display choice
    If you are recording a PowerPoint or Keynote presentation, choose the appropriate selection. 
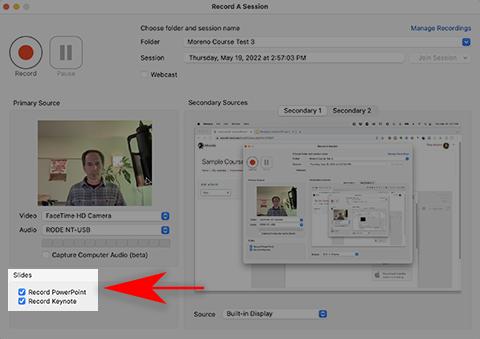
    panopto app recording interface slidedeck choices
  3. Click the record button, then go to your presentation and begin your presentation.
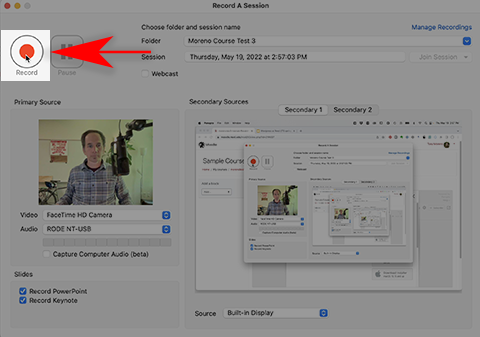
    panopto app recording record button 

Stop recording

  1. When your presentation is completed, close or quit your presentation. 
  2. Return to the Panopto interface and click on the stop button to stop your recording.
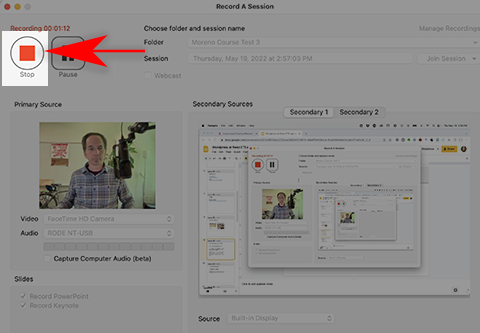
    panopto app recording stop recording

  1. You can change your video title, and add an optional description. You can also choose to delete and record again, or begin uploading your video.
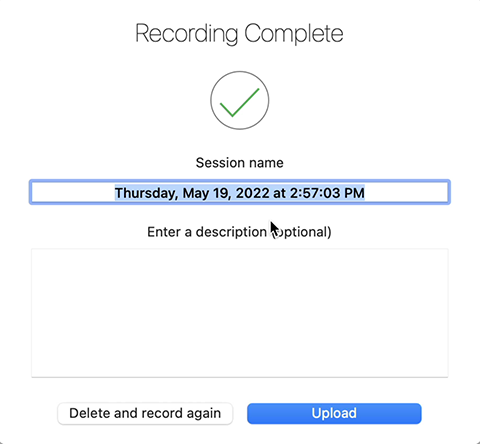
    panopto app recording rename session
  2. When the status message reads "Uploading 100%)", you can quit out of the browser app. 
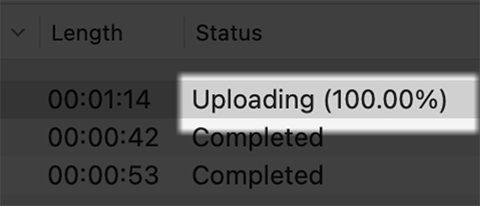
    panopto app recording uploading
  3. You can edit your video on the Panopto website or use the edit link in the Panopto app to remove the initial launching of your presentation from the recording.
Using the Panopto browser app


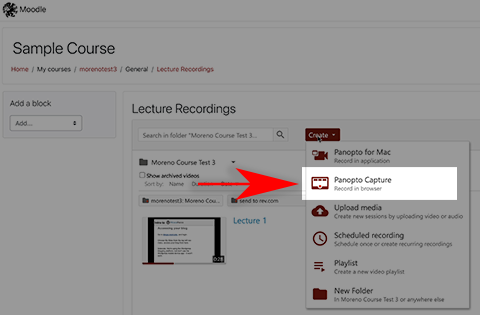
Navigate to the Panopto media library you would like to add your new video, and click on the Create button at the top of the page.

panopto app recording create butto

Choose Panopto Capture.

panopto app recording choose web app

You may have a pop up requesting permission to use your microphone, use your camera, or to record your screen. Choose Allow for all the prompts; if needed, open system preferences (if you’re on a Mac).

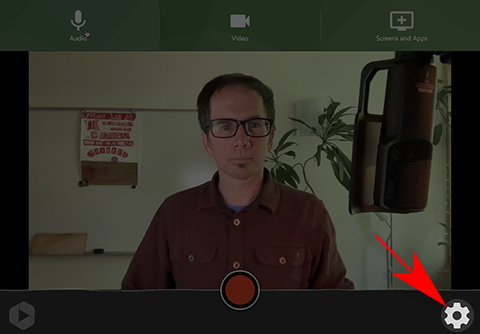
  1. Click on the gear icon for further recording options.
    panopto web app interface settings
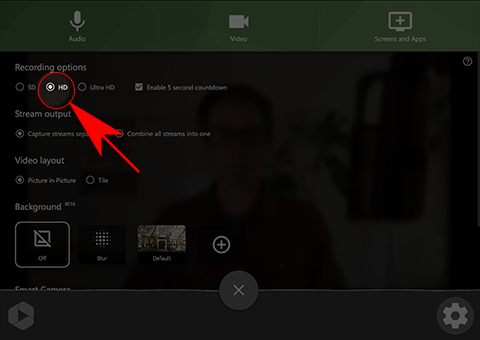
    1. Change the recording option to Ultra HD.
      panopto web app hd setting
    2. If desired, change your background, or turn on the Smart Camera feature, which will track your movement and try to keep you in frame.
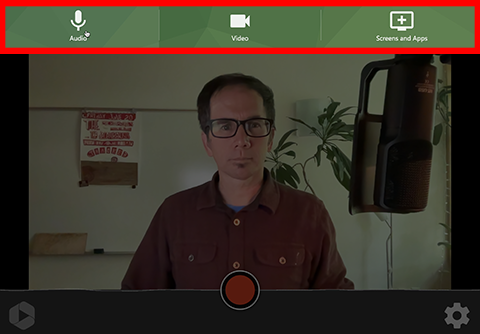
  2. Choose your audio, video, and screen/app to be recorded.
    panopto web app interface choices
    1. If you are using your webcam, choose video and select your webcam.
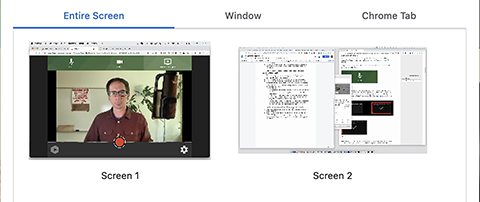
    2. Under the Screen and Apps option, you can choose to record your entire screen, a specific window, or a specific browser window. If you have two monitors, choose the appropriate monitor.
      panopto web app screen options
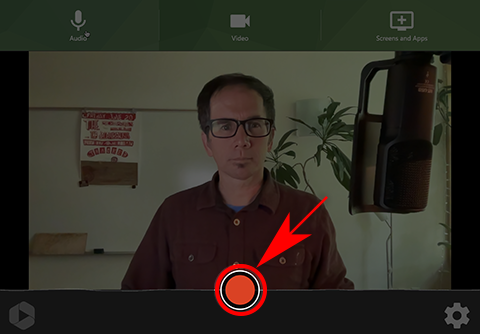
  3. Click the record button, then go to your presentation app and begin your presentation. 
    panopto web app interface record button
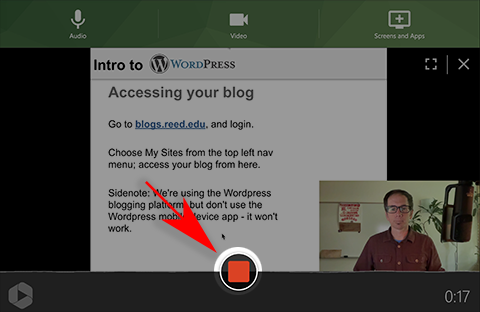
  4. When done with your presentation, close or quit your presentation and return to the Panopto interface. Stop your recording by clicking on the stop button.
    panopto web app stop button
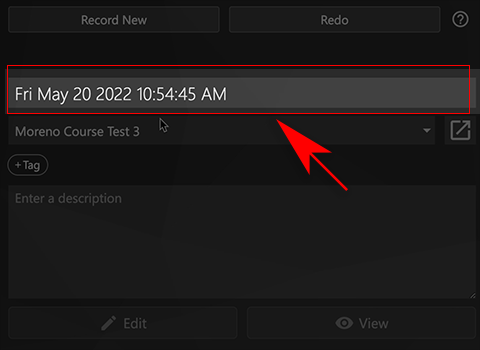
  5. Change the title of your recording if so desired.
    panopto web app lecture name
    The recording will start uploading to the Panopto media library; wait until the status bar says "Update complete."
    panopto web app upload status
    You will also have the option to:
    1. record a new recording, 
    2. redo the recording (which will delete the current recording), 
    3. view the recording, or
    4. edit what you just recorded. Use the edit link in the Panopto app to remove the initial launching of your presentation from the recording.