Editing your lightboard video
Beyond basic video editing, there are two additional editing steps that are necessary for lightboard videos.
- Flip the video horizontally. This is necessary because all text in the video is recorded backwards from the audience's perspective.
- Color correct. This will remove most issues of glare or a less-than-clean lightboard.
Here's a before and after shot, to get a sense of how your footage may look like when exported:

If you are on a Mac, you can use iMovie for these two steps.
Using iMovie to edit your lightboard
1. Flip the video
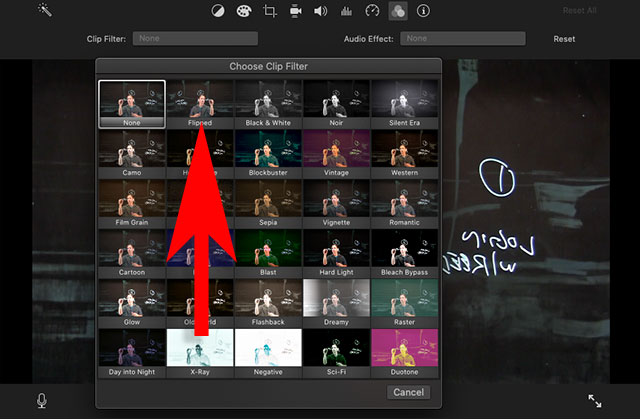
To flip the video, select the clip you want to change, then go to the filters tool.
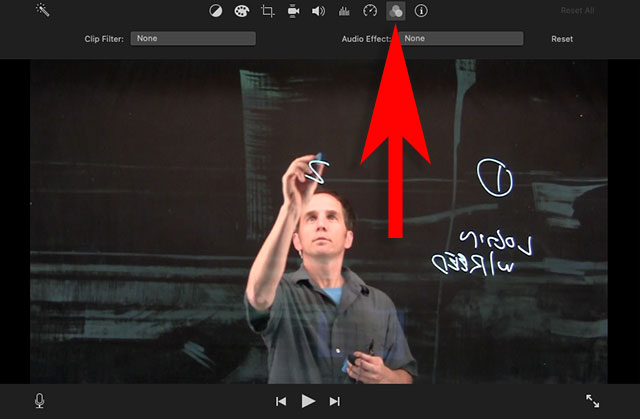
Choose the flipped filter; now your text should be readable to your viewer.
2. Color correct
To remove any screen glare or to hide any areas of the dirty areas of the glass (note the horizontal and vertical streaks that weren't cleaned), select your video clip, and choose the color correction tool.
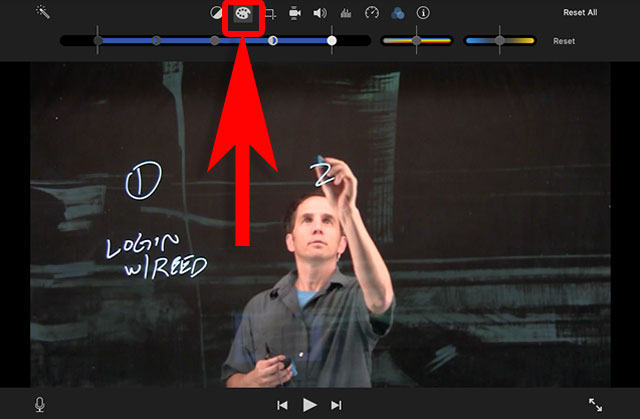
Move the sliders to your choosing - it will depend on how much color correction is needed, and each video will be slightly different. The graphic below shows 3 highlighted boxes. A suggestion is to move the left slider further to the right, as well as the middle slider. The right slider can be moved to the right.
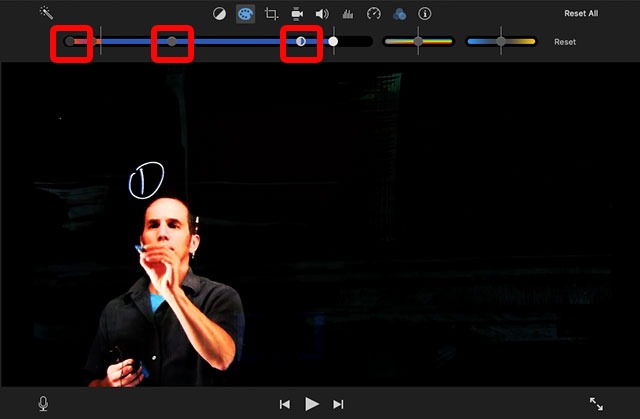
After doing these two steps, you will probably want to trim out the beginning and ending of the video, add any additional videos or media, and then export the movie.
You may need to reframe your video to show only the lightboard. To do so, select your clip, then choose the reframe tool.
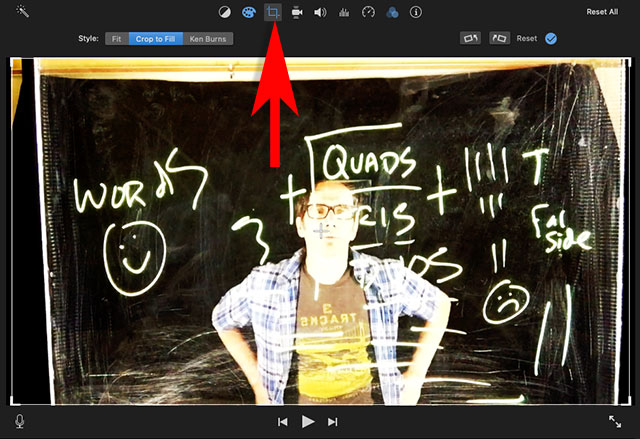
Change the style to "Crop to Fill."
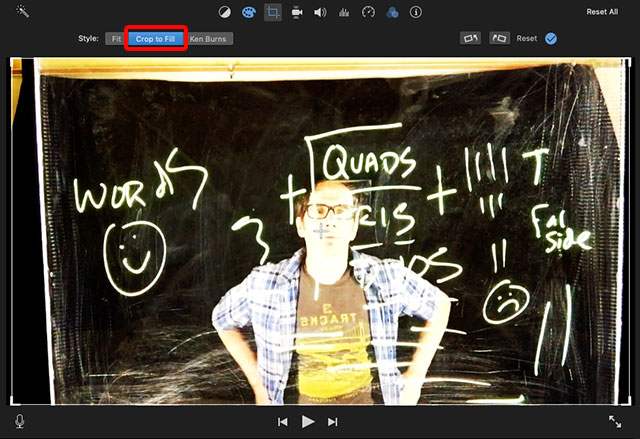
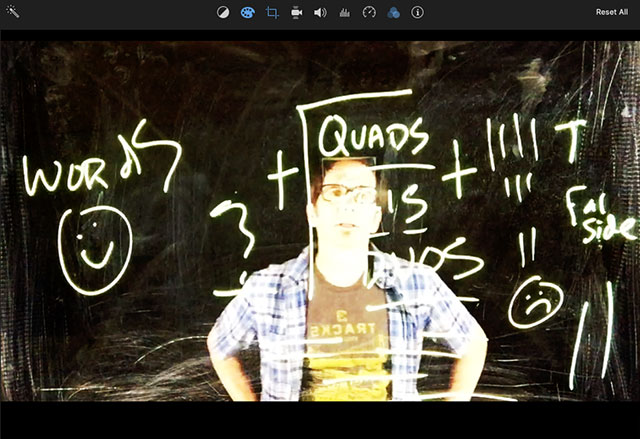
Drag one of the corners of the white rectangle to reframe your video. Click anywhere on your video timeline to see the finished cropped image.
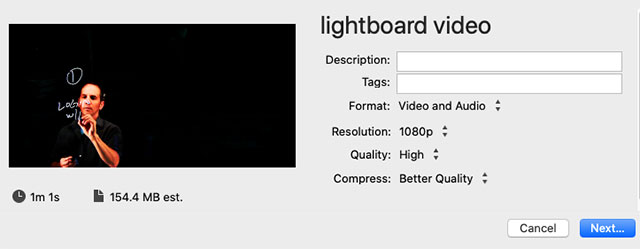
Exporting your media from iMovie
Go to the File/Share media, and choose File.
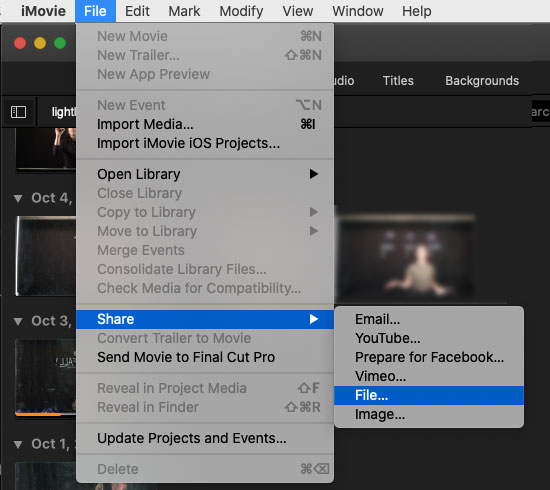
Choose these settings to export your media.
Upload the finished files to the Panopto media server.
Questions? Contact ITS@reed.edu